How to redo the grinder in the wall chaser
When building a new house or when seriously renovating an old apartment, very often there is a need to hide communications in the walls. To do this, make the grooves in the surface of the wall - horizontal or vertical narrow and long grooves. Construction companies use a special tool for such work - a wall chaser. However, at home, you can make it analogue of the usual grinder.
Content
Construction of wall chaser
At first glance, the wall chaser resembles a manual circular saw.
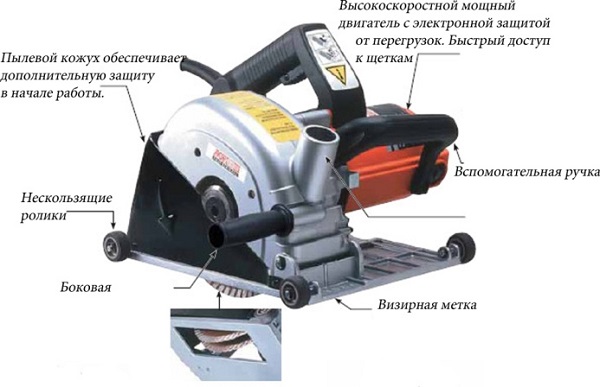
On closer inspection, there are several significant differences. The bearing pad is adjusted to obtain the desired depth of cut. Hiding under the protective cover immediately two circles, the distance between them also varies depending on the desired width of the groove - so you can get a groove of the desired width and depthin one run. On the casing visible tube designed to connect the hose of a vacuum cleaner. All the dust from the edge of the disk is removed to the dust collector, and not scattered around the room.
Self-made replacement for a standard wall chaser
Anyone who makes repairs on their own is unlikely to buy expensive equipment for short use. Therefore, you can try to make a furrow with your own hands. The easiest way to redo an existing tool. Some wall chaser designs give a hint.
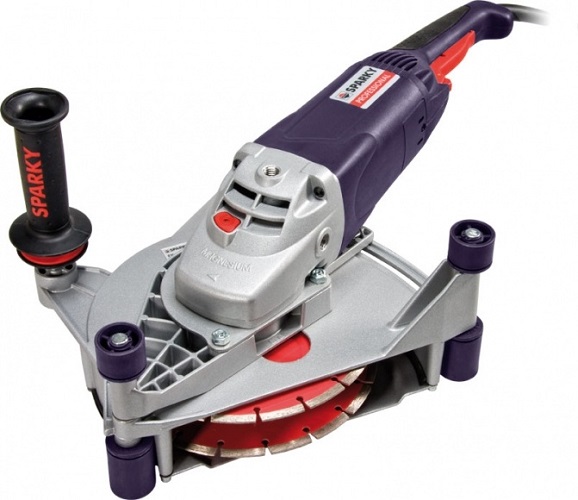
The tool drive very much reminds all familiar grinder. Why not adapt it for cutting furrows? For this you will need:
- second disk;
- thrust pad;
- protective cover with dust exhaustion.
With the disk, the issue is solved by installing an additional separator washer. The distance between the discs, respectively, and the width of the gate, is limited by the length of the spindle of the gearbox.
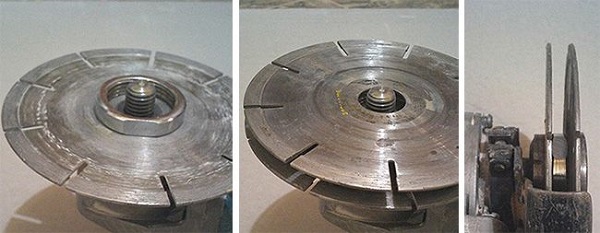
This way you can make a wall for an electrical cable - it does not need to make a groove of a wide width. Strob for pipes much wider, so the mounting nut will have to be finalized. On it the sleeve with an external carving on one end is welded.The length of the sleeve after the first disk wear one or more nuts, the total size of which corresponds to the required width of cutting. The second disk is fixed with a regular nut from another grinder. The whole structure is shown in the drawing below.
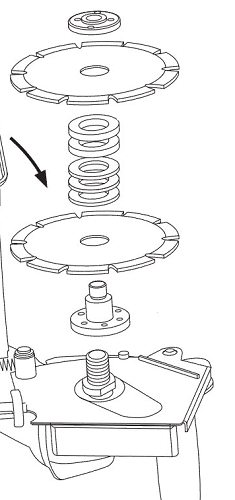
The casing can be bought ready, sometimes they are found on sale.
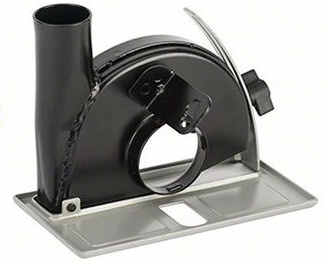
In the absence of goods on sale, the grinder will have to be redone. As you can see, the shrouding casing is not so complicated as to not try to make it with your own hands.
We make a casing on the grinder
For one-time work, you can use primitive covers with a tube to connect the vacuum cleaner hose. Such devices are made in a couple of hours.
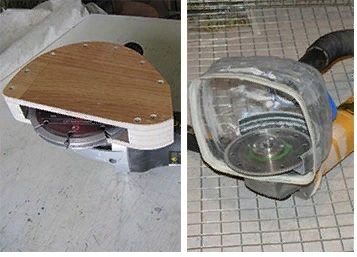
When multiple use is expected or a large amount of work remains to be done, it is worth thinking about making a more reliable construction. Attachment on the grinder has a complex configuration, so for the manufacture of a complete casing for the wall chaser you will have to weld several parts together.
For a homemade casing will need:
- sheet iron;
- threaded studs;
- nuts on the studs;
- rectangular tube;
- welding machine.
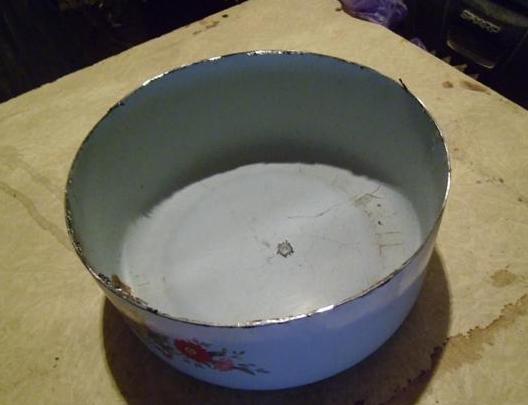
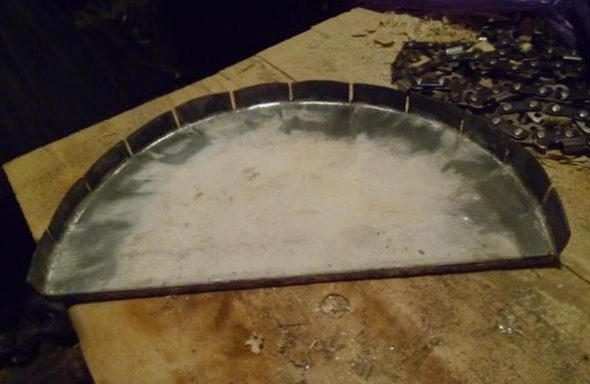
The process begins with the manufacture of the casing. Procurement can serve old pan suitable size. The walls are cut off from the pan so that the container with the sides, whose height corresponds to the maximum width of the groove, remains.
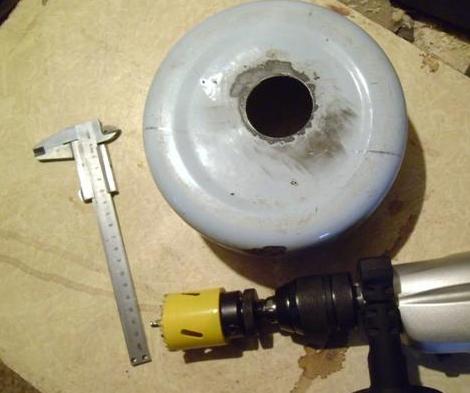
In the center of the bottom cut a hole in the diameter of the regular casing of the grinder.
The mounting clamp is welded to the hole. A sheet of metal is welded around the yoke to increase rigidity.
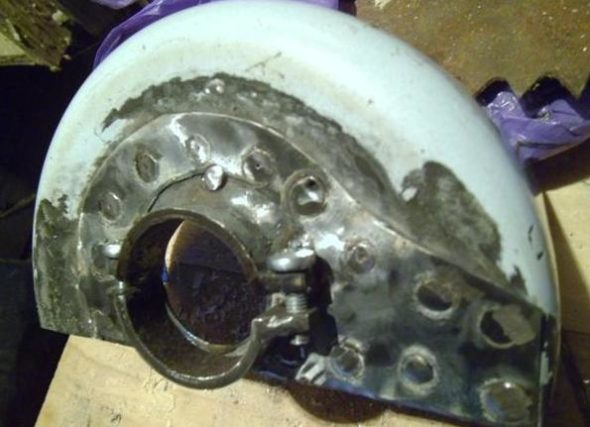
Then the outer side of the casing is cut out of sheet iron and welded to the previous part.
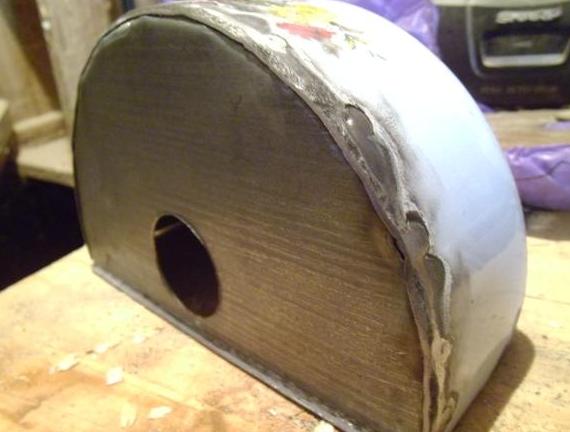
Of piece of pipe cut out the hose nozzle for the vacuum cleaner and welded to the rounded side of the structure.
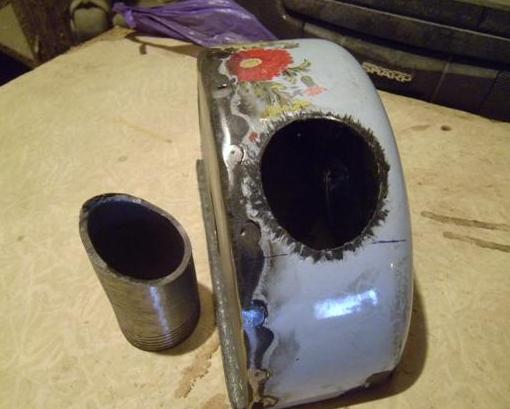
The handle stud is welded to the top side of the nozzle.
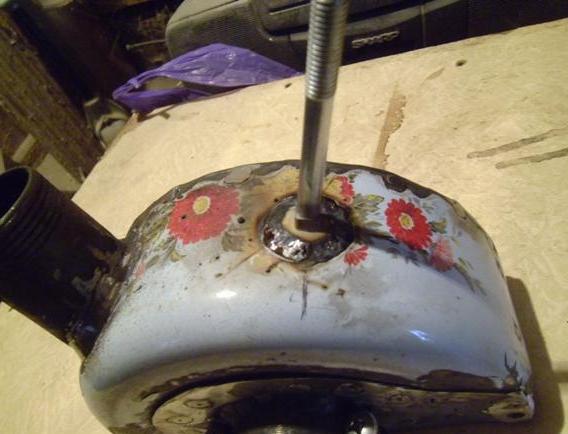
Getting Started foot soles. The rectangular tube is cut along, cut into two parts, welded at a right angle. Cheeks welded on both sides.

The short side serves to rest the body of the grinder, and the long side supports the wall.

An elongated nut is attached to the back side of the casing, and a stud is screwed into it, which regulates the depth of the gate. At this production nozzles can be considered finished.
Nuances of grilling by grinder
Strobit wall is impossible without dust.In addition, the Bulgarian in the classical form does not allow to control the depth of the groove. So you can damage the reinforcement of the bearing wall. For this purpose, and used a special nozzle. The washers between the discs change the width of the groove under the wiring or tube. The hose of the vacuum cleaner is connected through the pipe, the handle on the top allows you to more accurately withstand the cutting direction.
It should be noted that the grinder is not intended for long-term continuous work, therefore every 15-20 minutes it is necessary to take breaks to cool the electric motor and gearbox. The remaining techniques are the same as with the factory wall chaser. Self-made design may not be sufficiently accurate and centered. With heavy loads, the beating present can be dangerous.
Grinding of the grinder can be done at a sufficiently high height, so with a vacuum cleaner it is desirable to use a hose of increased length.

/rating_off.png)


