We carry out repair blender do it yourself
This useful device, which was recently a curiosity, can now be found in almost every kitchen. Many hostesses can not imagine how they used to do without a blender. His appointment - mixing products until a homogeneous mass. But what to do if the device suddenly suddenly failed? If you know a little about electrical engineering, the answer is simple - try repairing your blender yourself.
Content
Device design
Most commonly used hand blender. If it is completed with a rotating bowl, it turns into stationary and significantly increases its capabilities.

Before you start repairing a blender, you must first familiarize yourself with its design. The device includes:
- The tight case from plastic.
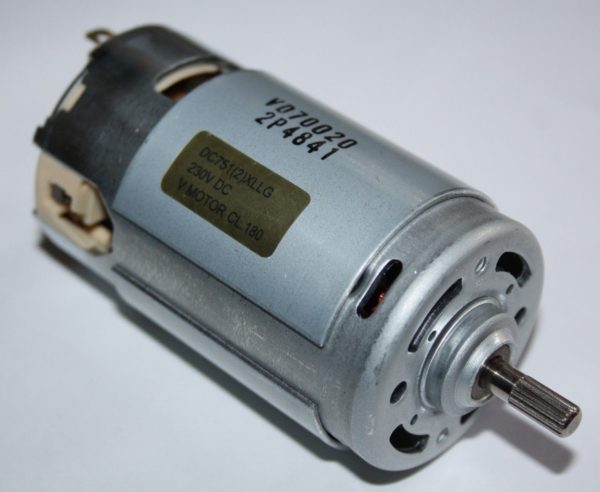
- Electric motor with surge protector.
- Switch.
- Speed control.
- Replaceable nozzles.
Depending on the type, the electrical circuit can be significantly expanded. Power is supplied from a household electrical outlet with a variable voltage of 220 W or a built-in battery charged by an adapter.
The principle of operation of the device lies in the transfer of the rotational energy of the electric motor through an adapter, directly to the nozzle. High speeds allow you to use the blender as a chopper or juicer. By adjusting the speed of rotation, you can result in an optimal consistency of the prepared mixture.
The most frequent breakdowns of the hand blender
Malfunctions of the blender can manifest themselves both in the electrical circuit and in the work of mechanics. The most common failures are due to improper use of the device. Causes of uncharacteristic operation or failure in overloadwhen the nozzles have to rotate with difficulty for a long time. This is also facilitated by pollution and lack of lubrication.
The blender is a fairly durable device, but it can not withstand a fall from a height or a blow with a hard object.This applies to both the housing and the circuit inside.
The electric motor is the main part of the device. About his malfunction signals:
- Complete silence of the device.
- Intermittent operation and drop in speed under load.
- The characteristic smell of burning insulation.
- Sparks observed through the hull and intense heating of the device.

Cheap models have the same speed, and the power of the electric motor is carried out directly through the diode bridge. To change the rotational speed, a speed controller is added to the device. This scheme can also cause the blender to stop and require repair. Faults in it are manifested by factors similar to those described above.
From mechanical faults observed nozzle breakage and poor grip them with the adapter located on the motor shaft. Repairs blender tips demonstrated step by step on the video:
In stationary models, faults are added to the described faults in the motor, rotating the bowl and the clutch, which provides rotation.
Trouble-shooting
Self repair blender begins with the preparation of the required tool. You need a Phillips and flat screwdriver, a tester (multimeter) and a soldering iron.You need to be ready to replace some radio components.
Any repair of household appliances is preceded by an external inspection of the device and checking the availability of power in the network. Special attention is paid to the plug and the supply cable. He looks at the integrity and the absence of kinks. When damage is detected, the cable is replaced with a new or proven used.
Attention: it is not worth repairing a damaged wire with a plug by splicing and using electrical tape. The blender is constantly used in the presence of moisture, which can cause short circuits or electric shock.

Without revealing external flaws, proceed to disassemble the device. This operation must be carried out with special care not to damage the case. It should be borne in mind that some models can not be disassembled. In this case, the repair of the blender is somewhat complicated. The housing is not equipped with mounting screws, and the connections are taped. Independently disassemble such a device can be with an ordinary knife. The procedure is well described in the video:
In other cases, disassembly is carried out with a screwdriver and release the latches.Do not forget that after removing the fasteners, the case should open easily, otherwise there must be a masked fastener that was missed during an external examination. Disassembly Philips blender can be seen in the video:
Blender Vitek has its own characteristics. The body halves are fastened with snaps, but the main fastener is a screw, hidden under a switch that is removed by gently prying it with a screwdriver.
Vitek brand products belong to the budget and blenders owners often have to deal with malfunctions of this equipment.
Wiring and motor
After disassembling the blender, the motor and circuitry are removed. They are checked visually. If no obvious damage is observed: the smell of burning wiring, charring of radio components, shaft seizure, poor soldering, should proceed to dial.
First of all, check the fuse, if any, and the quenching resistor. Then follows the continuity of the diodes. The cause of a malfunction may be a rectifier capacitor. At revealing of faulty parts, they are replaced by original ones or analogues.The main thing is that they match in power. Semistor, which is a regulatory element, is difficult to verify, but these parts rarely fail.

Speed adjustment can be carried out smoothly, using a resistor or discrete - switch. In both cases, they also need a dial.
Convinced of the operation of the electrical circuit, proceed to check the motor. The collector circuit makes it easy to identify the fault. The smell of burning and the lack of contact between the windings (access to which is done by disassembling the motor and releasing the collector) will indicate a burnout. In this case, further repairs are financially inappropriate.

Sometimes the lack of contact on the windings is justified. brush failure. They are easily removed and changed.
The reconditioned motor group should be easily turned by hand. Before assembly, all rotating parts must be cleaned and lubricated.
The blender is assembled in the reverse order. If you can master the repair yourself, it will not cost you anything do-it-yourself dipping blender.

/rating_off.png)


