We disassemble the washing machine yourself
The question of how to disassemble a washing machine arises when its breakdowns. They sometimes happen in any, even high-quality products. Do not be an exception and washing machines.
Content
Preparing for disassembly
In order to carefully and efficiently disassemble the machine, you first need to prepare for it. The better the workplace is prepared, the easier it will be to disassemble the machine. First of all, you need to determine the place where the unit will be disassembled. It should be bright and spacious enough.
The fact is that in the machines there are not only large partsbut also quite heavy.When disassembling a washing machine, they will need to be set aside so that they do not interfere with further work. From the tool you will need screwdrivers, pliers, a set of heads and a small hammer. Not a single disassembly of a mechanical assembly can do without WD-40 fluid, grease, solvent, sealant and clean rags. Since the machine is a rather complicated mechanism, it is desirable to photograph the entire disassembly process. Photos will play a positive role in the assembly. Substantial assistance in disassembling the machine will provide a video on this issue (presented below).
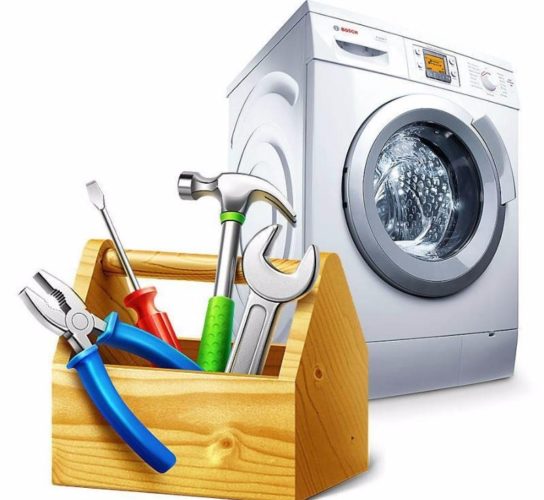
Proper organization of the workplace before disassembling a washing machine is the key to its success. The best place for such work is the garage.
Disassembly stages
Disassembling a washing machine includes the following basic steps:
- removing the top cover;
- disassembling the powder tray;
- disconnection of the loading hatch;
- dismantling of the electronic unit;
- dismantling TENA (heating element);
- dismantling the tank.
Each washing machine has its own design parameters. Therefore, the disassembly will also have its own characteristics.
Top cover removal
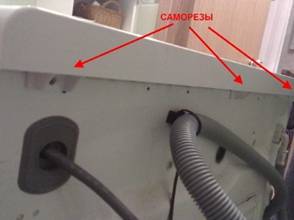
Removing the top cover of Bosch, Zanussi, Veko, Kandy machines is simple - you need to unscrew the two fastening bolts on the rear wall. On Electrolux machines, Ardo, it is fastened with self-tapping screws. Here, as a rule, there are no problems with the removal. The easiest cover is removed from Baby cars - there is no attachment at all. How to remove the top cover on the popular machine Indesit, you can read here.
Disassembling the powder tray
Dismantling the container for washing powder on all machines is identical and does not cause any special difficulties. There is no tray on Baby.
Disconnecting the loading door
In practice, this operation consists of detaching the front wall. The main difficulty will be to remove the hatch seal. To remove it, pliers and a screwdriver will be quite enough. The only thing you need to pay the closest attention - accuracy of work. Fragile plastic latches and delicate gum seals can easily fail, and this threatens with considerable costs for their restoration.
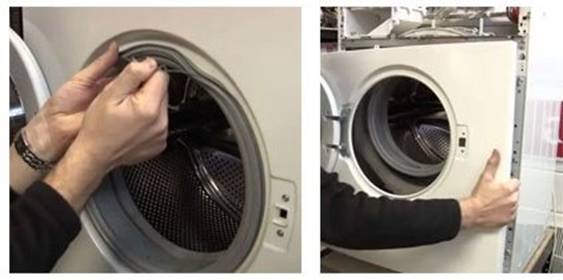
If the loading door is vertical, then dismantling it will be much easier.
Removing the control unit
Dismantling the electronic unit or the control panel also does not cause much difficulty. For example, when disassembling a washing machine Bosch it is enough to unscrew the two screws. In this case, disconnect the wires is not desirable, of course, if it does not require repair. The panel released from the attachment must be carefully laid on top of the machine.
By the way, on some brands for this there are special attachments.
Dismantle of TEN
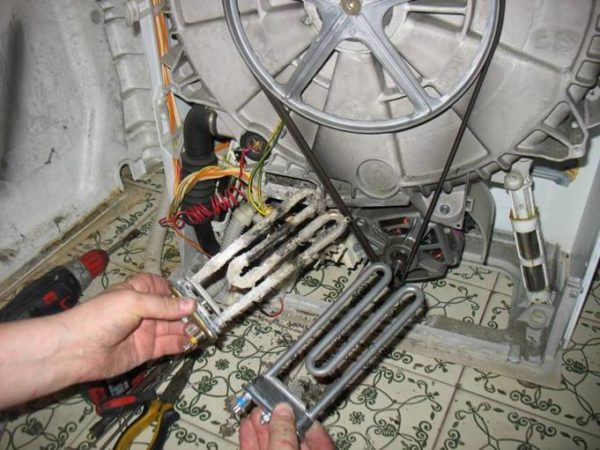
The next stage of disassembly will be dismantling of heating elements. Access to it on different brands of washing machines is not the same. To see it, on some models it is enough to remove the front wall. Such an arrangement TENA have Eyelid, Bosch, some models Zanussi. But the machines Electrolux, Ardo, Atlant, Zanussi, Candi TEN is behind. Having determined the location of the heater, it remains to remove it. Here it is necessary to remember about the inadmissibility of brute force: disconnecting the wires, you need to wet the fastening nut with WD-40 liquid, wait about 20 minutes and carefully begin to unscrew the fasteners. As soon as this happened, swinging the heater in different directions, carefully remove it from the seat.
Removing the tank
Dismantling the tank - rather complicated, but manageable operation.This work alone is not recommended because the tank has a decent weight. In addition, it is very inconvenient to remove it from the case. therefore an assistant is a must here. To remove the tank from the Bosch washing machines, you need to dismantle the front wall of the case, and at Ardo, Electrolux - the back. By car, Veko has to remove the front and back walls. The disassembled housing facilitates access to the tank retaining elements. The process of preparing for its removal about all machines are the same:
- all wires and connections are disconnected;
- counterweights are removed;
- TEN is taken out;
- disconnect shock absorbers and springs;
- taken out the tank.
Why do I need to remove the tank? It's simple. Inside it is a drum, which sometimes you have to get to replace bearing. Execution tanks has some varieties. Very easy to disassemble the tank in the washing machine Ardo. It is enough to remove the rear wall and the clamp, which secures the tank. After these operations, the rear wall of the tank is easily removed along with the drum.
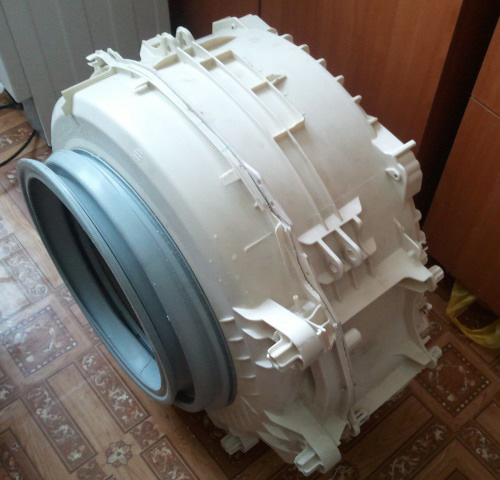
Structurally, tanks are made collapsible and solid. In the latter case, to access the drum you have to cut the tank in half.For example, this is how the bearing assembly of the Zanussi washing machine is repaired. The operation is quite serious, so it is better in this case to entrust the work to the masters of the service. But if you watch the video on how to disassemble the washing machine machine by yourself, you can handle this operation yourself. You can find out on what type of machines collapsible tanks are installed in of this article.
How to disassemble the machine Baby
Disassemble Washer Baby much simpler than other models. The only problem is the lack of a special key to remove the activator, which is not difficult to make yourself. Further disassembly steps are simple:
- remove the plug from the engine cover;
- to lock the rotor of the engine;
- unscrew the activator housing;
- disconnect the tank and the motor.
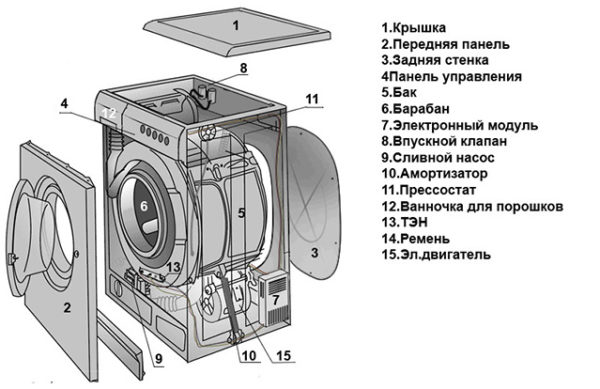
After performing these operations, Baby can be considered disassembled. The help of professionals is not needed here. The device of the machine is clearly visible in the diagram.
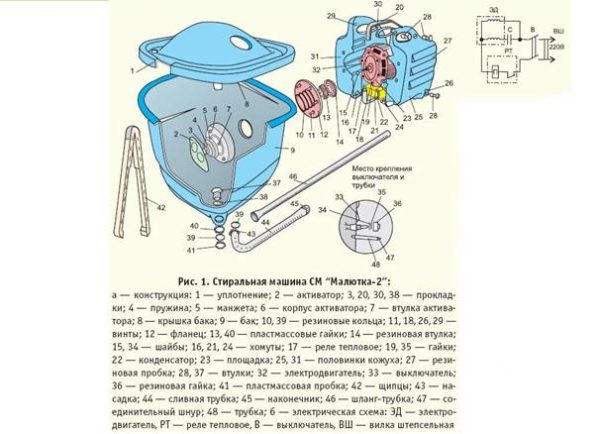
Thus, in the event of a breakdown, looking at the thematic video and instructions, feel free to disassemble any washing machine. A small metalwork experience and minimal knowledge of electrical engineering will contribute to success.

/rating_off.png)


