Do-it-yourself split-system installation
To put the air conditioner, as a rule, you need to call the specialists, who upon completion of the installation of the equipment will issue you a document showing the correct work. When you install a split system with your own hands, you lose the right to service under warranty. But, in order to save finances, many home craftsmen are trying to make installation of the air conditioner with their own hands. In this case, it is worth considering one thing: in order to qualitatively connect the external unit of the system with the internal one, and then to start the unit into operation, you will need to purchase a rather expensive equipment. In addition, the installation of a split system is quite troublesome if you carry it out yourself. Purchase of equipment is expedient in the following cases:
- you plan to move one or more units to new locations;
- if you purchased several units;
- you are planning a major repair in the apartment, which means complete dismantling,and then reverse mounting the split system;
- you want to help set up a split system with your friends or relatives;
- If this set of tools is useful to you, to make repair of the automobile conditioner.
In other cases, the installation of air conditioning in the apartment with their own hands is inappropriate.
Content
Standard equipment
In the standard split-system usually includes such components.
- Outdoor unit. Sometimes it can be equipped with brackets for mounting the external module.
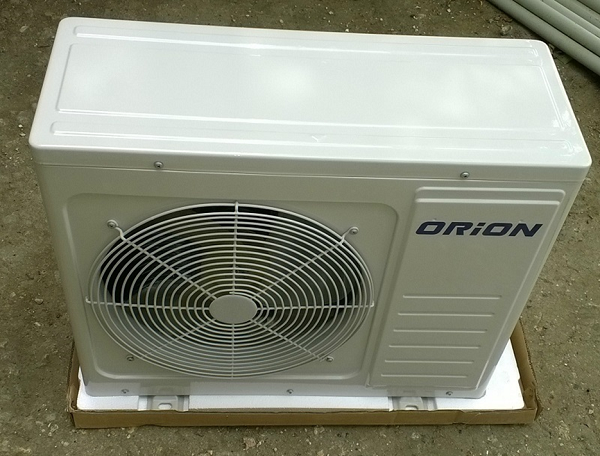
- Indoor unit (hair dryer).
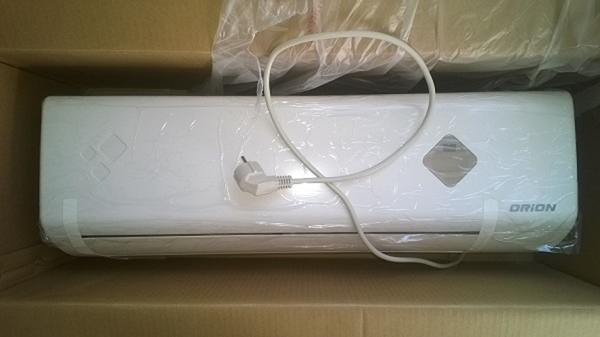
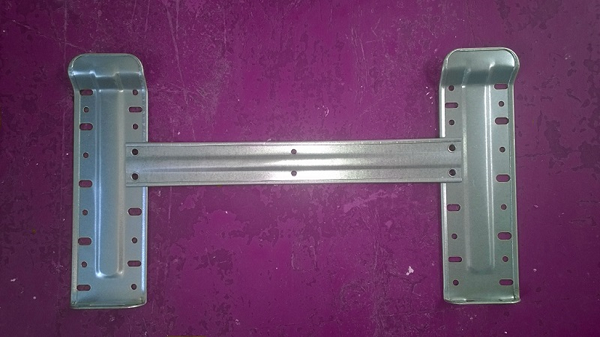
- Metal, perforated frame (may have a different shape). It is used for the installation of the indoor unit.
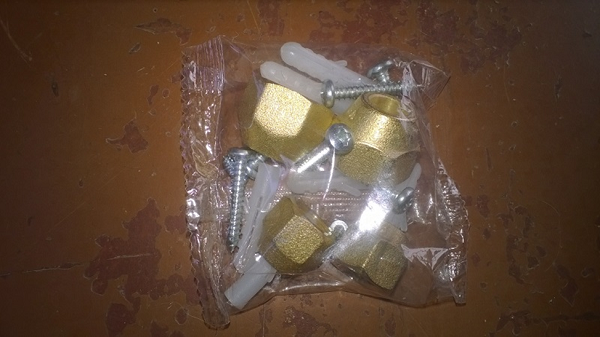
- The nutswhich are used if you need to extend the tube - 4 pcs., as well as self-tapping screws with plastic dowels for mounting the frame.
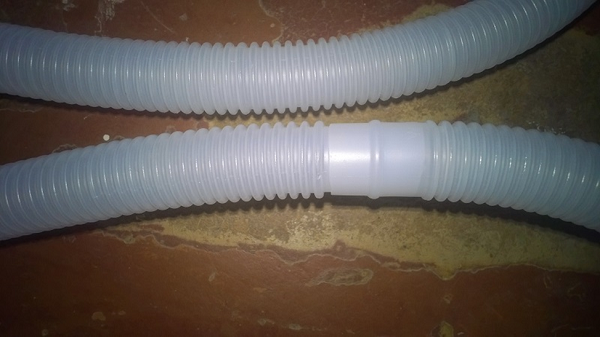
- Drainage (the tube through which moisture is drained from the internal module of the unit).If you want to lengthen the drainage tube, you can use a conventional metal pipe (plumbing).
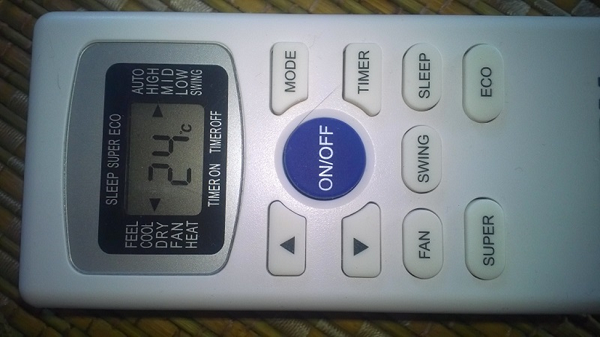
- Remote control.
- User's manual.
Important! To install the air conditioner with your own hands and start it up, you need to supplement the standard equipment of the device.
Installation materials and tools
To independently install a split system, you will need to purchase the following materials.
- Electrical cables. The required cable cross-section is indicated in the installation instructions. The most commonly used 4-core cable having a cross section of 2 to 2.5 squares. When calculating the length, all bends are taken into account and a small margin is added, about 30 cm.
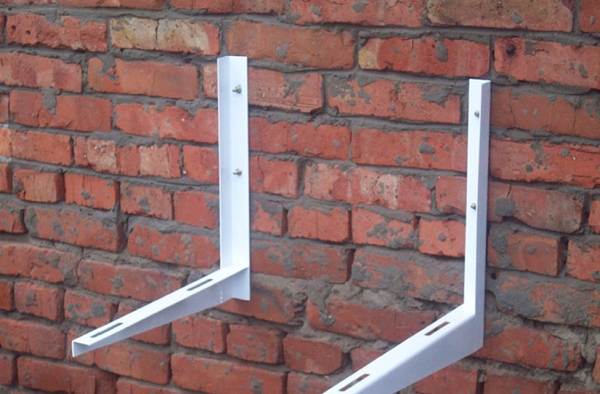
- Mounts. Have the L-shaped form and are selected on the size of the unit chosen by you. On them installation of the external, heaviest block of the conditioner is made.
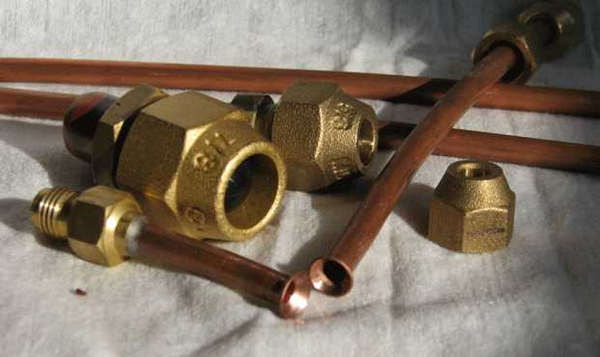
- Copper tubes. They must be thick-walled and seamless, and specially designed for air conditioning systems. The ends of the tubes must be closed with plugs that do not allow various debris to get inside. The length of the pipe must be equal to the length of the route.Bending should be taken into account, and another 20-30 cm should be added to the obtained value. The diameter of the tubes depends on the equipment manufacturer. The enclosed installation instructions for the air conditioner can provide answers to questions about the diameters of copper tubes.
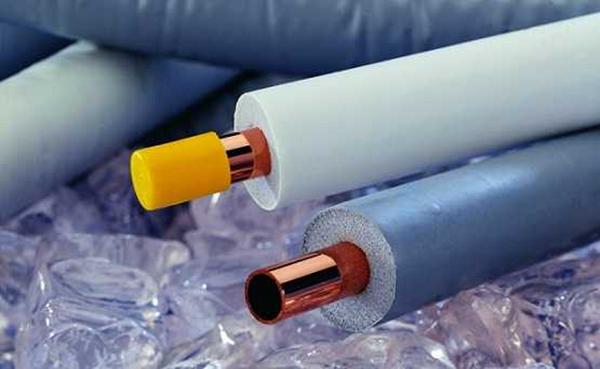
- Thermal insulation. For these purposes, usually used rubber "sleeve". It can be of any color. The length must be equal to the length of the entire route with a margin multiplied by 2.
- Reinforced tape.
- Anchor.
Without a special tool also can not do:
- pipe bender (how to use, shown on video);
- stripper;
- pipe cutter (how to use it, you can learn from video);
- rolling (see video);
- gauge manifold;
- Vacuum pump.
The choice of installation location for the indoor unit
The location of the internal module must be such that during its operation you will not experience discomfort from the flow of cool air.. If you look at the next picture, it will become clear without words what are the ideal options for installing an air conditioner in an apartment.

When placing the module over the head of the bed, the flow of cold air will not fall into the rest area and will not be harmful to health.It is recommended to arrange the workplace so that the air flow is either on the side or behind. If the table at which you work is under the air conditioner in an apartment or office, you can install a special screen under the hairdryer to direct the flow along the ceiling.
Installation requirements for indoor unit
There are the following rules for placement of the indoor unit air conditioner in the room:
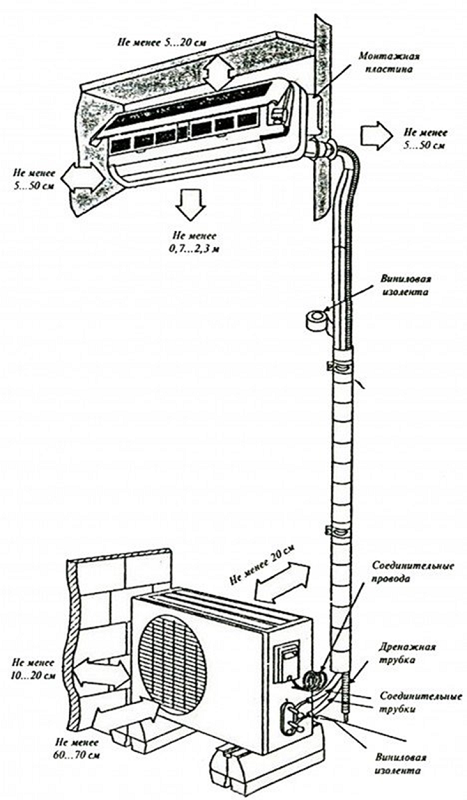
- the distance between the hair dryer and the ceiling should be at least 15 cm (some models are installed at a distance of 20-30 cm from the ceiling);
- the distance from the installed block to the wall to the right or left is at least 30 cm;
- an obstacle in the air flow path should be no closer than 150 cm.
Sometimes the question arises: at what height to hang the internal module, if the room has high ceilings? On average, you can hang air conditioning on the wall at a height 280 cm from the floor, as it shown on the picture.
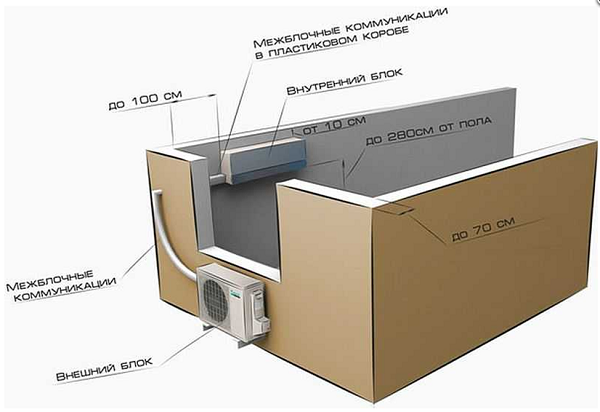
The following figure shows examples of different installation options, clearly showing how best to install an air conditioner.
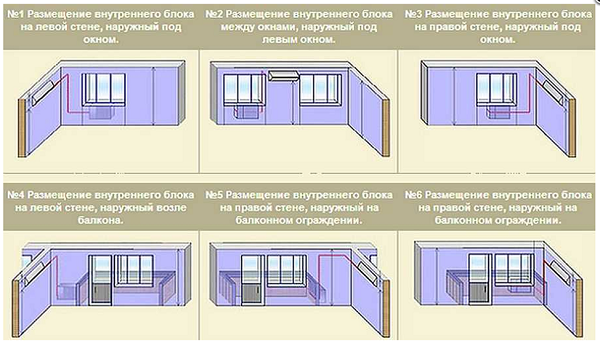
Installation requirements for outdoor unit
The external module of the unit is usually placed under the window, near the window or on the balcony. If the balcony fence is strong enough, then you can fix the module on it.
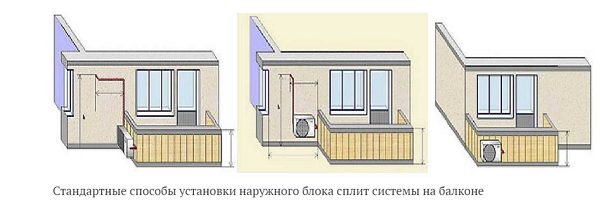
If the apartment is located on the first floor, then the outdoor unit must be located at a height of at least 2 meters from the ground, adhering to the rule: the outdoor unit must be mounted slightly below the internal one, or at the same level with it.
When installing modules of a split system, remember the values of the minimum and maximum distances between them.. These values may vary among different manufacturers of climate technology. For example, for Panasonic split systems, the minimum distance between modules can be 3 meters, and for Daikin - from 1.5 to 2.5 meters.
Some manufacturers do not specify the minimum distance at all. In this case, the blocks can be placed on the “back to back” principle.
The maximum length of the path between the modules is usually 6 meters. Allowed and more, but in this situation will be required freon refillthat entails additional material investments. Therefore, if you are self-installing the air conditioner, it is better not to exceed the indicated 6 meters.
Installation Procedure
The order of installation of the air conditioner, including the inverter air conditioner, implies a phased installation of all its modules and highways.Installation must be performed following the step-by-step instructions given below.
Installation of indoor unit
Rules for installing the air conditioner state that at the first stage it will be necessary to install the indoor unit (hair dryer) of the air conditioner. To do this, follow these steps.
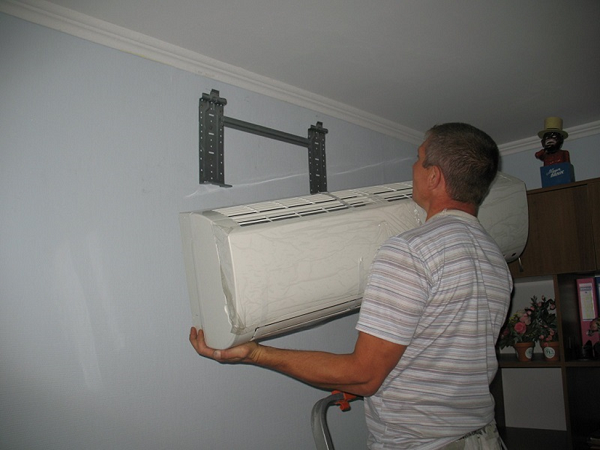
- To install the air conditioner yourself, take the steel mounting frame and attach it to the wall at the place of the intended installation of the hair dryer (taking into account all the distances described above). It is important that the frame for the installation of the air conditioner was placed strictly horizontally (use building level).
- Mark the place under the mount.
- Using a perforator, make holes in the wall and hammer plastic dowels into them.
- Attach the plate to the wall and secure it with screws.
- The hair dryer is suspended on the mount (plate) for the air conditioner, after which you need to check the horizontal again. If you allow the air conditioner to skew in the room in the opposite direction from the drainage channel, then the liquid will accumulate in the pan and flow along the walls.
Preparation of communication channels
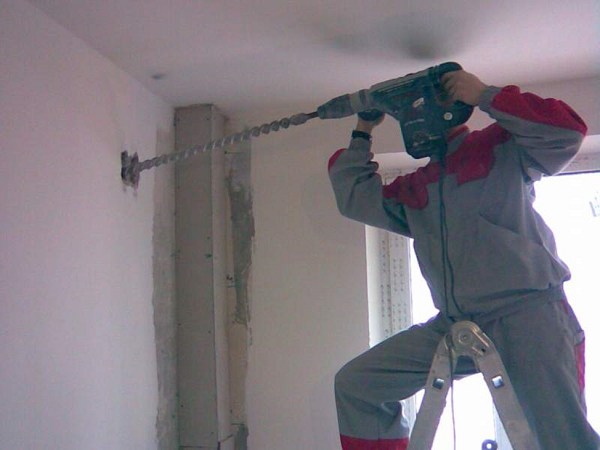
Installing the air conditioner with your hands continues preparing the canal for the main line.In order to bring out the tubes of the freon circuit, the supply cables and the drainage, it is necessary to make a hole in the wall of the appropriate diameter. For this purpose, a puncher with a long bit is used. For free drainage of condensate into the street, it is necessary to do it when drilling the wall small slope.
Installation of the outdoor unit
Installing an outdoor unit air conditioner is considered the most time consuming process when installing split systems. The difficulties are related to the fact that the weight of the module can reach 20 kg or more, due to the compressor placed in it. In addition, most often the external module is installed at high altitude.
To begin, make a markup using a level. Then, using a perforator, make holes. Further, the anchor bolts are screwed into them, and the brackets themselves are screwed to them with nuts. After the brackets are securely fastened, an external module is installed on them.
When installing the air conditioner, especially the outdoor unit, you will need the help of at least one person.. If the module is installed at high altitude, then you will not be able to install the air conditioner yourself.It is better to use the services of climbers to hang this module.
The outer module is attached to the brackets with bolts. It is recommended to put a thick rubber under the legs to reduce vibration.
Connection of blocks by communications
To continue the installation of the split system with your own hands, you need to connect both modules to each other.
- First of all, remove the protective plastic covers on the terminals of the external unit. Using the instruction, connect to them the control and power cables that come from the indoor module.
- Carefully, to further connect the modules, produce route mounting your air conditioner, having previously put thermal insulation on the tubes (the ends are fixed with reinforced adhesive tape). To prevent debris from getting into the tubes, also tape them over with tape. The track is attached with clamps screwed to the wall. After that, measure the length of the line and cut the tubes, leaving a reserve of 10 cm. Put the cap nuts on them and roll the ends. Using a rimmer, remove the chamfer. Laying of the highway (highway) under the air conditioner can be carried out both outside the room and inside, if for aesthetic reasons it is forbidden to place any communications on the facade of the building.
- Using the flare nuts, screw the pipes first to the fittings of the external module, then to the fittings of the internal one.
- Secure the drain tube using plastic clips.
Below is a diagram of the connection of split-system modules.
Evacuation
Without evacuating the line, the refrigerant must not be launched into the system. This procedure will require a vacuum pump and a gauge manifold. The pump is connected to the filling fitting through the manifold, as shown in the figure below (the valves on the manifold must be in the “closed” position), after which it turns on for 20-30 minutes. to remove air from the system.
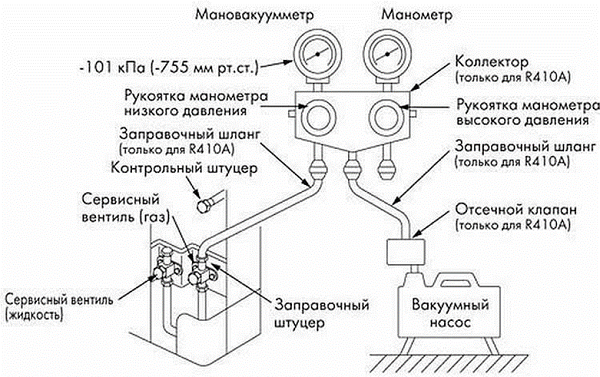
After switching on the vacuum pump, it is required to open the handle under the low pressure gauge. After a short period of time, the arrow on the manometer will begin to fall and will reach zero, within 30 seconds or more. Pump down time depends on the length of the line and the diameter of the tubes. The position of the arrow at zero means that in the highway a vacuum was formed.
Do not turn off the pump at this stage. Continue to evacuate for about 30 minutes. After the specified time, first stop the cock on the collector,and only then disconnect the pump. If the faucet is not closed, air will leak into the system.
It is recommended to watch the gauge arrow for 20-30 minutes. If it does not rise, then the highway is tight.
Freon filling
Freon is launched into the system without disconnecting the hoseconnected to the valve service port. If this is done before the refrigerant is started, air will enter the line.
In order to start up the refrigerant in the system itself, it is required, using the Allen key, to slowly open the valve located on the liquid valve. After filling the route with refrigerant, you can unscrew the hose connected to the service port located on the gas valve.
Attention! When disconnecting the hose, the release of freon, which is able to freeze hands and damage the eyes, is possible. It is recommended to wear goggles, and gloves on your hands. The person is required to be kept away from the choke.
It is necessary to unscrew the fitting from the valve as quickly as possible to reduce the loss of freon. Do not be afraid of loud hissing. The nut at the exit of the refrigerant can be covered with frost. Do not touch it without gloves, so as not to get burned.
All leakage connections can be washed. After checking, tighten all the plugs on the valves of the valves, not making great efforts, but well enough. If you tighten them slightly, it is possible that in the winter period will occur freon leak.
After you have verified that the line is tight, turn on the split system for a while, then check all connections again. At this stage, the installation of a wall-mounted air conditioner is considered complete.
Do I need permission
People often ask if they need permission to install a split system, and can it be installed without coordination with the authorities? Based on practice, permission to install the air conditioner is not required. An exception may be cases when it is necessary to coordinate the installation of air-conditioning equipment with the authorities, in buildings that are architectural monuments or have historical, aesthetic value. In other cases, approval for the installation of climate equipment is not required.

/rating_off.png)


