Homemade argon welding
Argon welding is an indispensable method by which you can create permanent connections of products from non-ferrous metals, titanium, stainless steel and other alloys. In addition, this type of welding has a good weld quality and high performance. The versatility of argon welding also attracts home craftsmen. But this equipment has a high cost, and for home use almost never bought. Therefore, more and more craftsmen are beginning to think about making their own hands of an argon welding unit.
Content
Technology and application of argon welding
Argon welding is a bit like an ordinary arc, but it is used to protect the weld pool. protective gas - argon. This inert gas has a number of properties inherent only to it.
- Since argon is 38% heavier than air, it penetrates well into the weld pool and protects it from gases in the atmosphere. Due to this, the welding seam is obtained without the formation of an oxide film, which improves connection quality.
- Argon is present in the air; therefore, it is a byproduct resulting from the production of oxygen and nitrogen from the atmosphere, and is the most inexpensive among protective gases for welding.
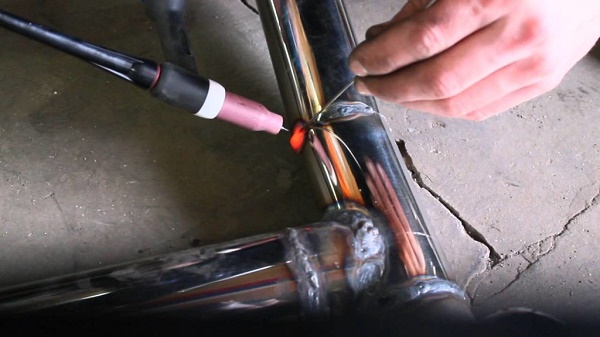
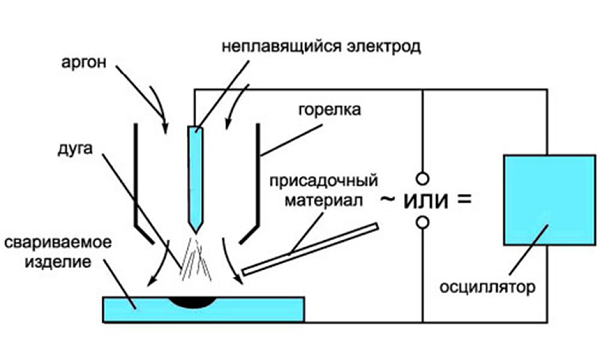
The process of welding in an argon environment occurs as follows. Just 1 second before the ignition of the arc, argon is fed into the burner. The welder brings the electrode to the part prepared for the connection and presses the power button. But since the ignition of an arc in a protective gas requires its high ionization, an oscillator takes over.
An oscillator is a device that produces high-frequency and high-voltage pulses that can ionize a gas and ignite an arc between the electrode and the workpiece.
After ignition of the arc, the filler wire is fed manually or in automatic mode to the junction of the parts. The parts are welded by melting the additive, the metal of which falls on the molten edges of the joined blanks.
Traditionally, argon welding involves the combination of metals with a non-consumable tungsten electrode, creating an arc, and additives in the form of a metal rod or wire. This type of welding has the international designation “TIG”.
Argon welding is used in the following areas.
- Frame construction. Welds can withstand constant loads.
- The joining of pipes, both steel and non-ferrous metals, including pipes of various alloys.
- Compound dissimilar metals.
- Splicing of practically any metals between each other: titanium, copper, aluminum, stainless steel, bronze, brass, cast iron, etc. This is especially important for the automotive industry.
- Making decorative and jewelry.
Elements for the assembly of a homemade device
To assemble equipment for argon welding, you will need the following items:
- welding machine of direct current or inverter type;
- oscillator;
- inverter protection unit;
- burner;
- balloon with argon;
- gas reducer;
- gas hose;
- welding cables.
Current source
As a current source for TIG welding, you can take the usual welding transformer and at its output adapt a diode bridge for current rectification. You can also use welding rectifier. But for both types of devices you will need to add another oscillator, which will contribute to the contactless ignition of the arc.
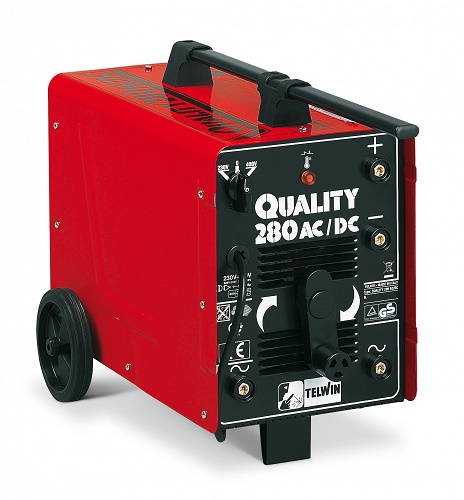
On the Internet, you can read what is easiest to do argon welding from an inverter. But there are a few nuances. There are inverters in which already built-in opportunity for TIG welding. In this case, it is enough to connect the sleeve with the torch for argon welding to the apparatus, connect the hose to the cylinder with argon, and the unit is ready for operation. But first you need to switch it to TIG mode and set the required amperage.
It should be noted that in such inverters an oscillator and the necessary protection are already built in.
Inverters without built-in TIG welding function cannot be used for this purpose. Even if you connect an external oscillator to it, the inverter will simply burn. To avoid this, you will need a small inverter rework, which is to add a protection block to its scheme. This unit can be assembled together with the oscillator on one board and placed in a separate case. Get a small prefix for the inverter.
Oscillator and protection block
As mentioned above, a welding attachment will require a special attachment for TIG welding. It can be assembled by hand according to the scheme provided below.
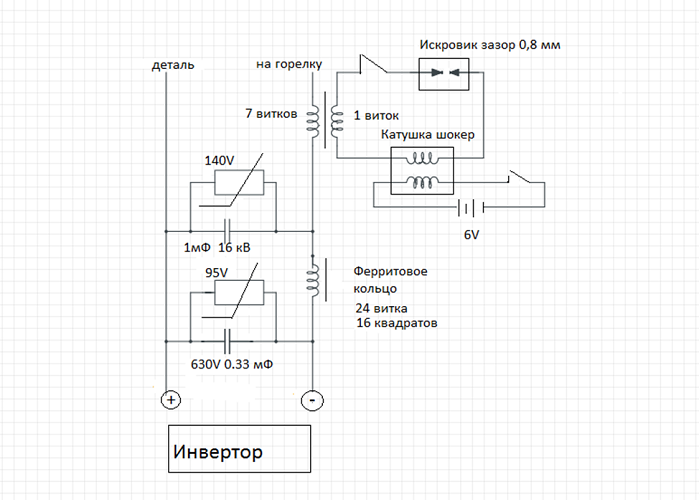
This circuit includes a protection block (located on the left) and an oscillator. The latter can be purchased in China or assemble yourself. How is the above scheme going, you can find out by looking at it video.
Burner
For argon welding, a special torch is used, consisting of a ceramic nozzle and a tungsten electrode holder.
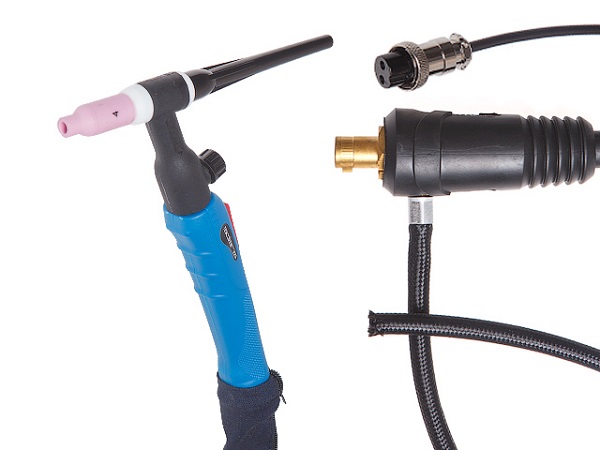
Also on the burner there is a start button and a gas supply valve. The burner can be assembled from components that are sufficient on Chinese websites, or buy ready-made (assembled) ones in the same place.
Argon balloon
For safety reasons, it is customary to paint all gas cylinders in different colors and inscribe different colors on them too. Below is a picture that shows all the varieties of gas cylinders with their respective labeling and color.

As can be seen from the figure, cylinders of black (with a white stripe) or gray (with a green stripe and an inscription) are used for argon. For tig welding apply purified argon. Therefore, you will need to purchase a gray balloon with a green inscription “Argon Pure”.
Tip! For professional use are used cylinders with a capacity of about 50 liters, with a large weight. But for domestic use there will be enough 10-liter can that can be moved independently.
Gearbox
Since the gas in the cylinder is under great pressure, then to apply it to the burner, you need a gearbox. This device shows the pressure in the cylinder and allows adjust gas flow rate through the hose leading to the burner.
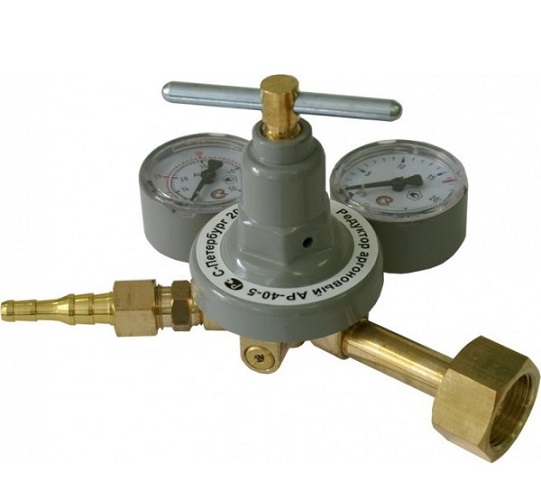
The reducer should be chosen strictly under a certain gas, that is, in this case - under argon. Usually the device has the same color as the gas cylinder.
Hose and welding cables
If you assemble the sleeve for argon welding yourself, then it will turn out thick and poorly bending, since you need to place an electric cable and a gas hose in it. In addition, you will need to separately purchase connectors for connection to the burner and to the inverter (ifuse an inverter with TIG welding capability). The finished sleeve for argon welding can be bought in the same place as the torch.
Welding Machine Algorithm
The assembly of equipment for argon welding from an inverter is quite simple.
- Connect to the inverter a protective unit with an oscillator according to the scheme above.
- Ground cable must be connected to the terminal of the oscillator with a “+“. The cable that goes to the burner is connected to the terminal with a “-” sign. For aluminum welding, the cables are connected in reverse.
- Connect the burner to the hose with cable and gas hose.
- Screw to the cylinder with argon gearbox.
- The gas hose must be connected to a gearbox mounted on an argon gas cylinder.
- Connect the inverter to 220 V and the oscillator to the 6 V power supply.
After that, the self-assembled TIG welding machine will be ready for use. But first it should be properly configured.
Setting up the finished equipment
Self-made installation for argon welding requires the following settings.
- Sharpen the tungsten electrode on the sharpener so that it becomes looks like a needle. This is done so that the arc is concentrated at the end of the needle and does not “walk” in different directions.
- Take a torch and install a tungsten electrode into it. The diameter of the electrode should correspond to the collet in which it is fixed.
- Open the valve on the burner and adjust the required argon flow rate using a reducer (a flow rate of 12–15 l / min will suffice), then close the valve on the burner again.
- Turn on the oscillator and bring the torch with the electrode to the metal to which the ground cable is connected.
- When you press the power button between the metal and the electrode at a distance of about 0.5 mm, an arc should appear.
- Turn on the gas and press the button again. In this case, the arc should be ignited already at a distance of 10 mm or more.
After carrying out the above simple settings, we can say that the device with the TIG function is fully operational.

/rating_off.png)


